

Microsoft Viva Goals
Create a purpose-driven culture where teams align to achieve results
Empower each person to understand their impact and keep priorities top of mind.
-
Create clarity and stay aligned at scale
Connect employees and teams to your organization’s top business goals, help them understand their impact, and ensure cross-functional alignment.
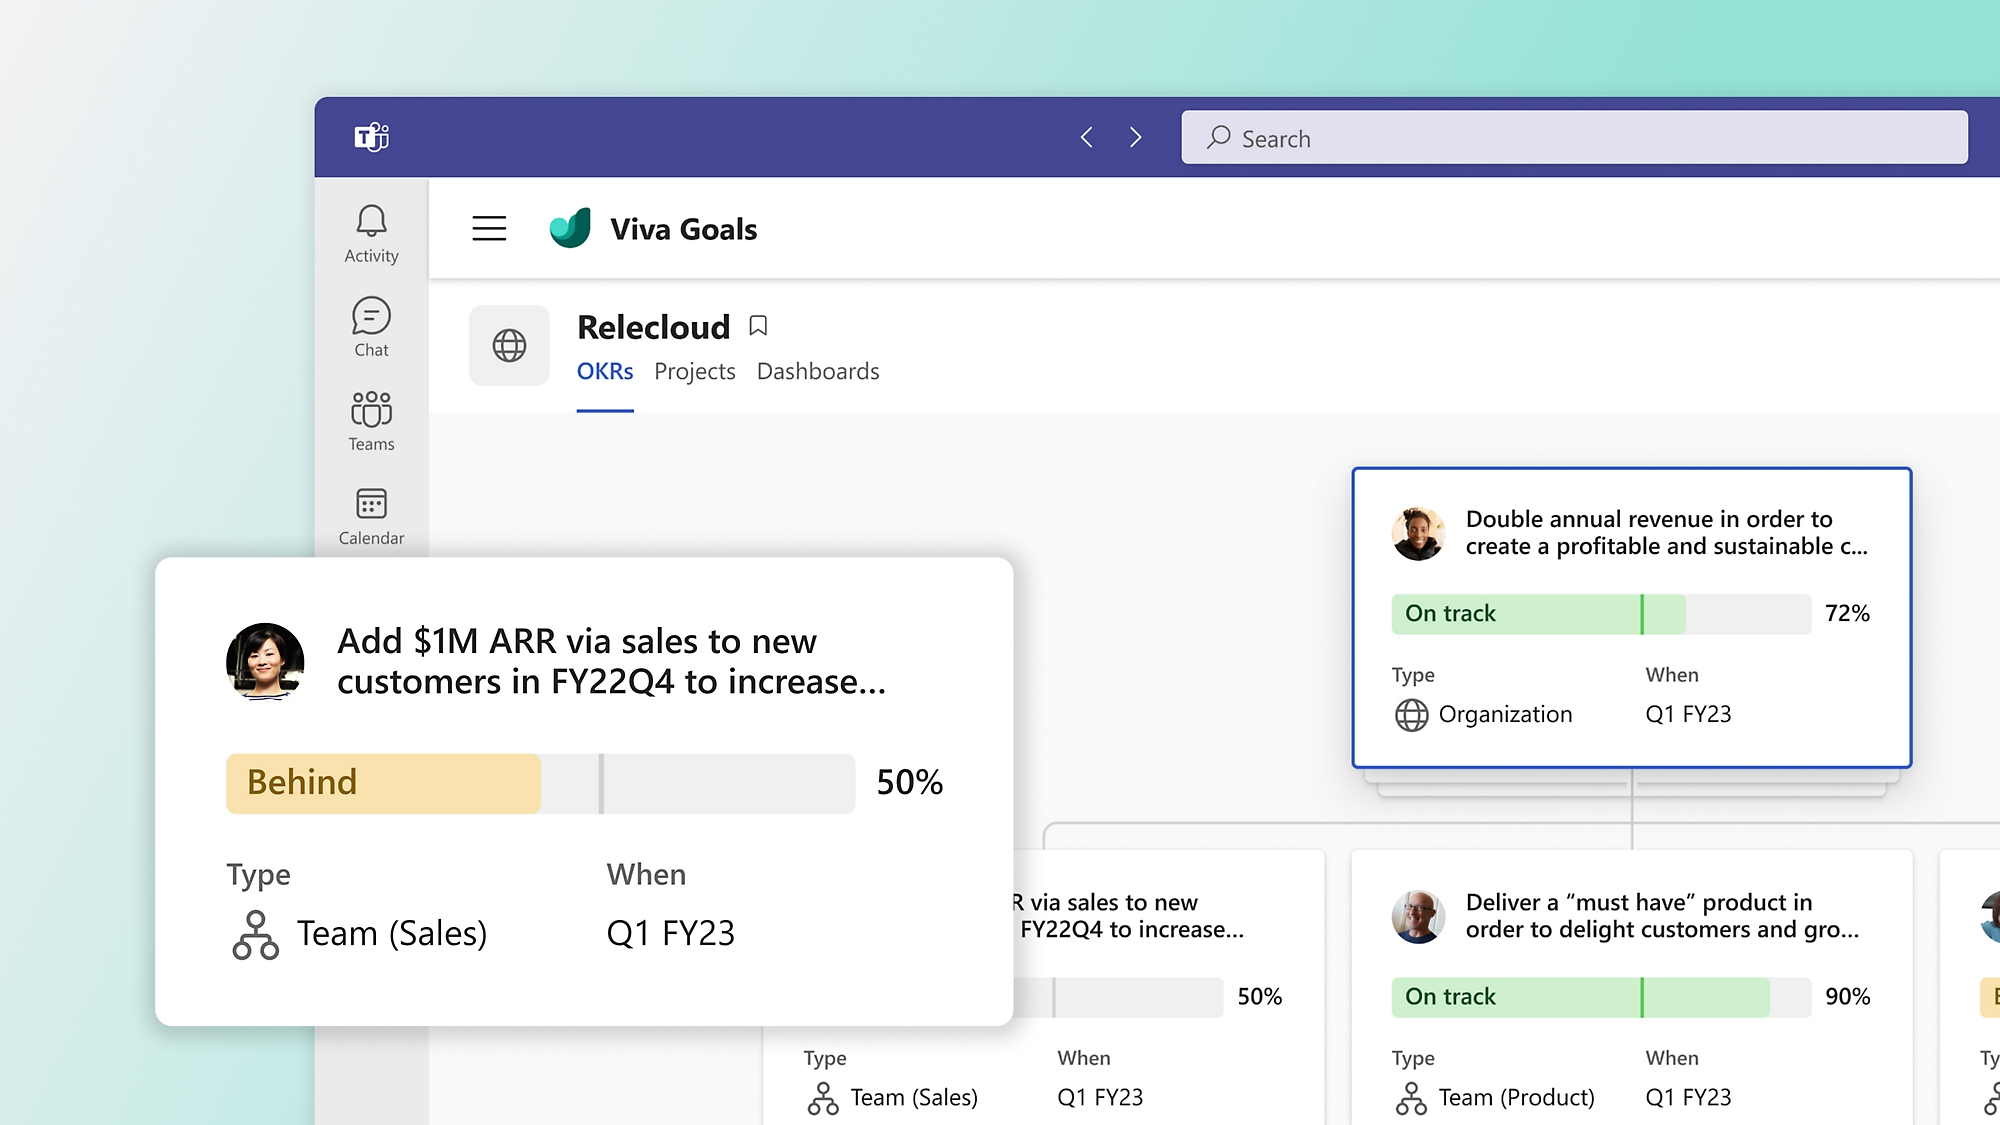
Easily create, approve, and align on goals
Create new OKRs or start with built-in templates and define success at all levels with approval workflows and flexible views.
Foster an aligned, purpose-driven work culture
Gain visibility into company goals with organizational, team, and individual views, and focus teams on your most critical priorities.
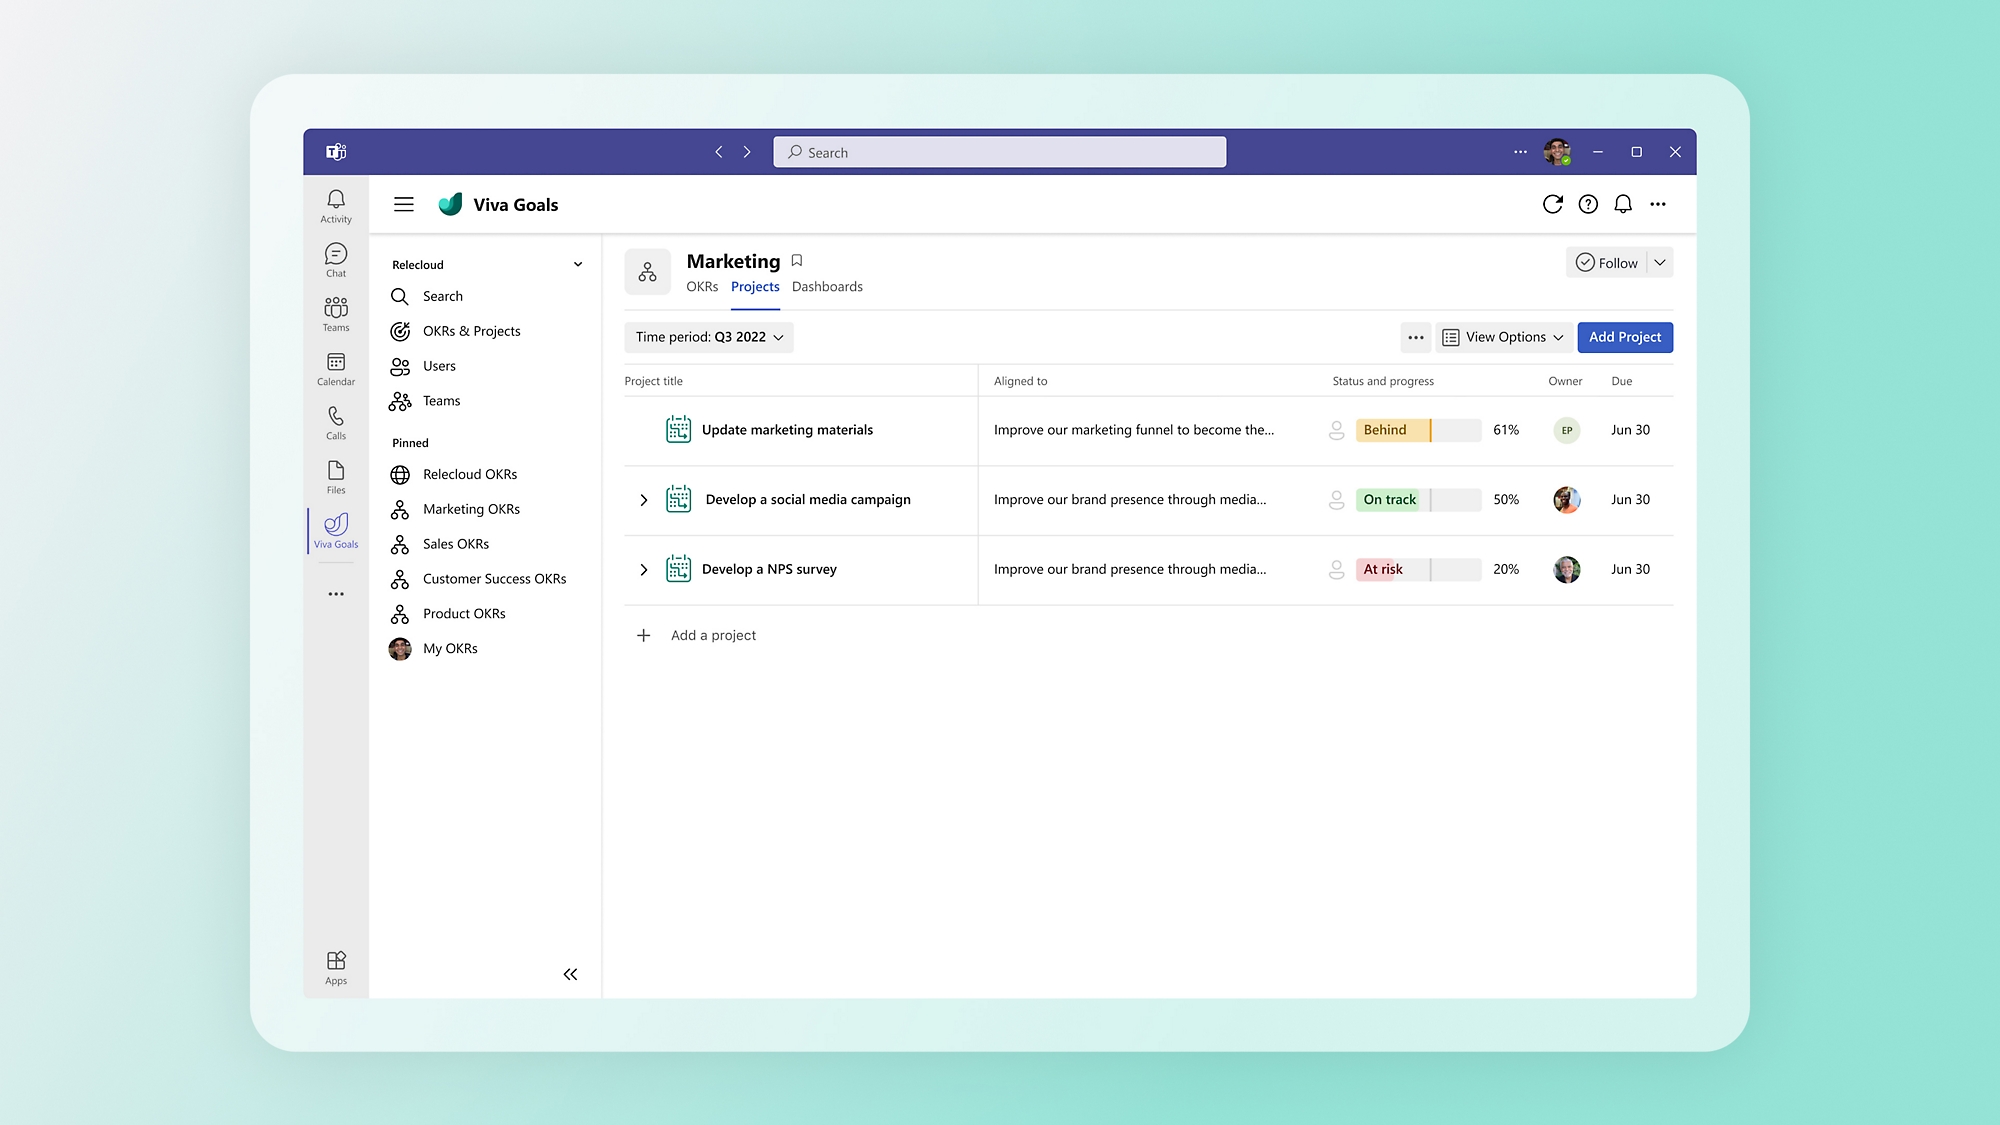
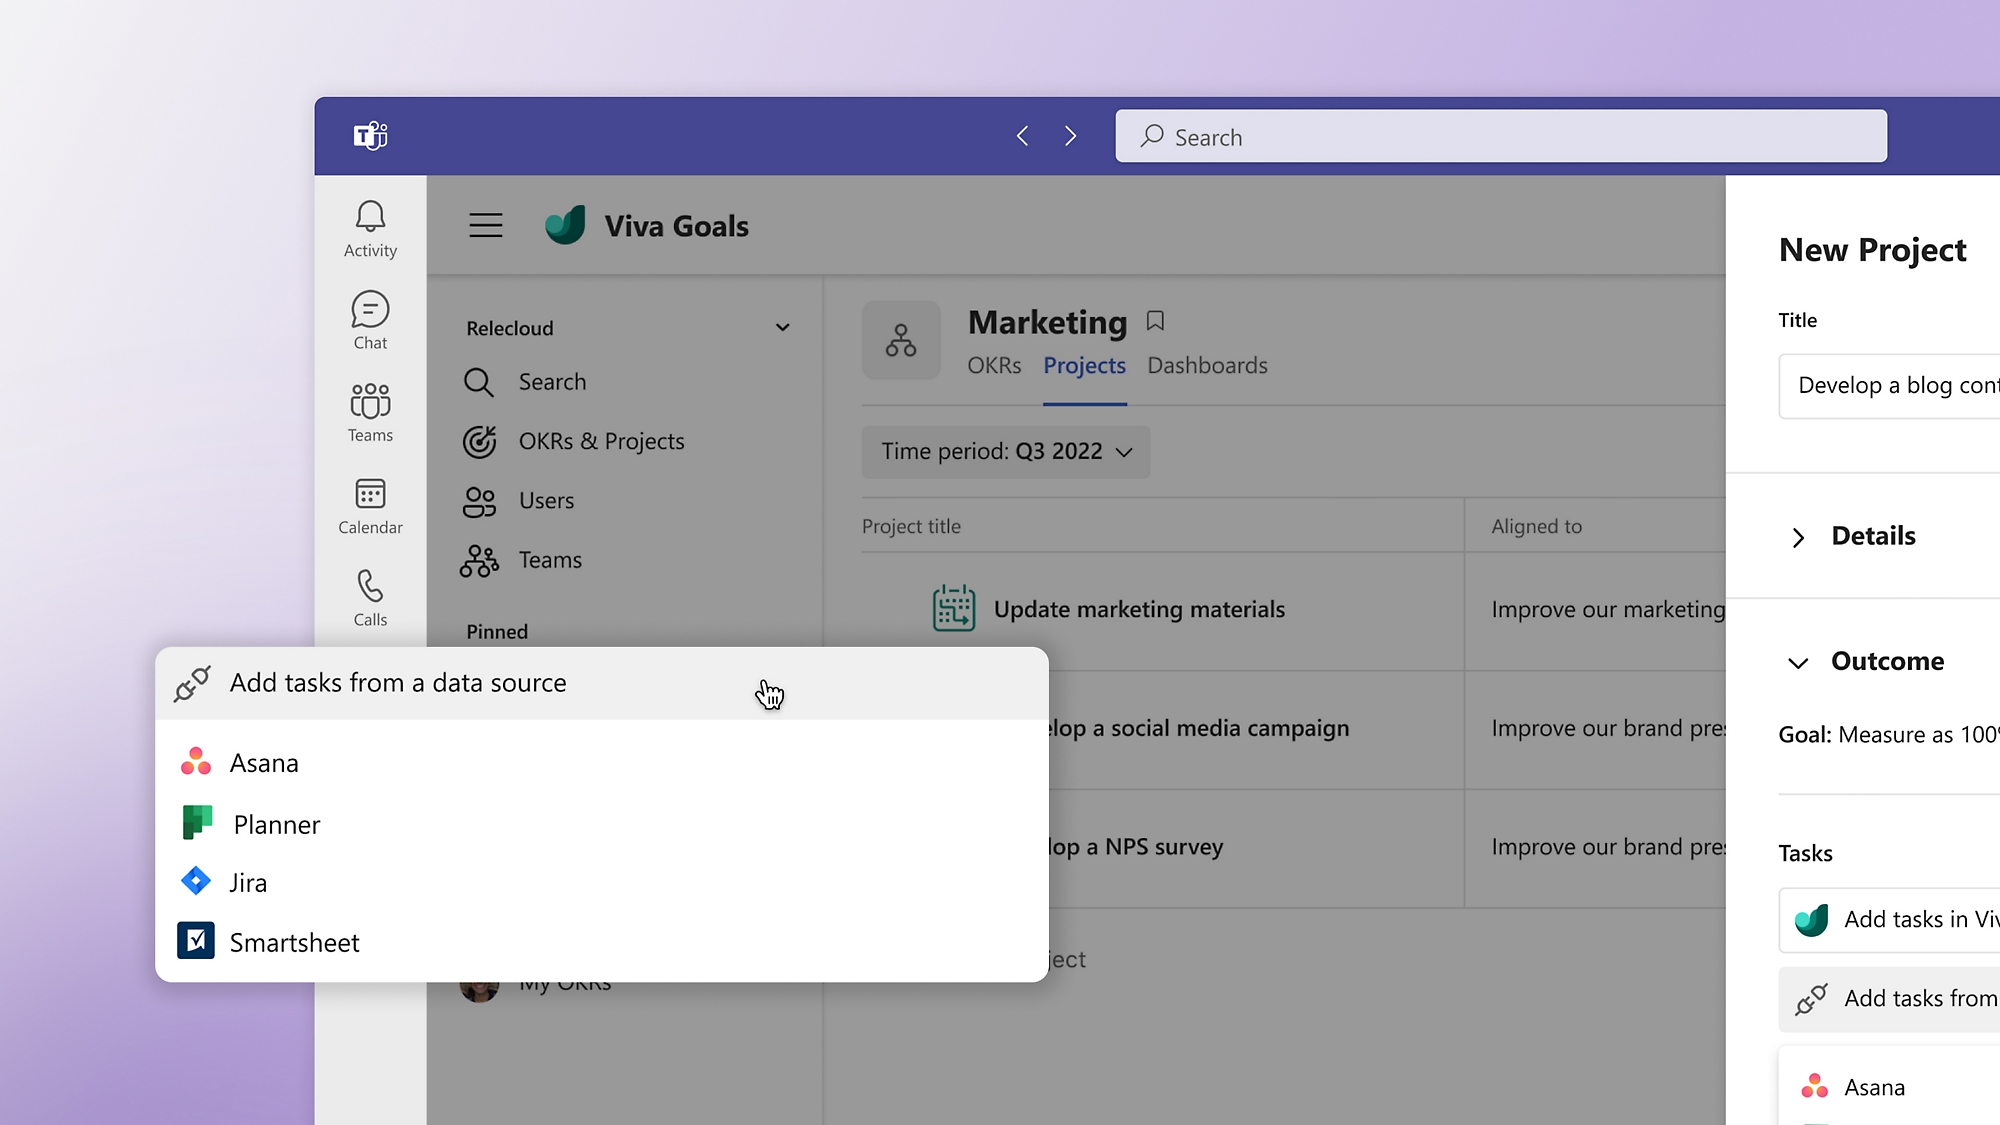
Back to tabsConnect projects and tasks to OKRs
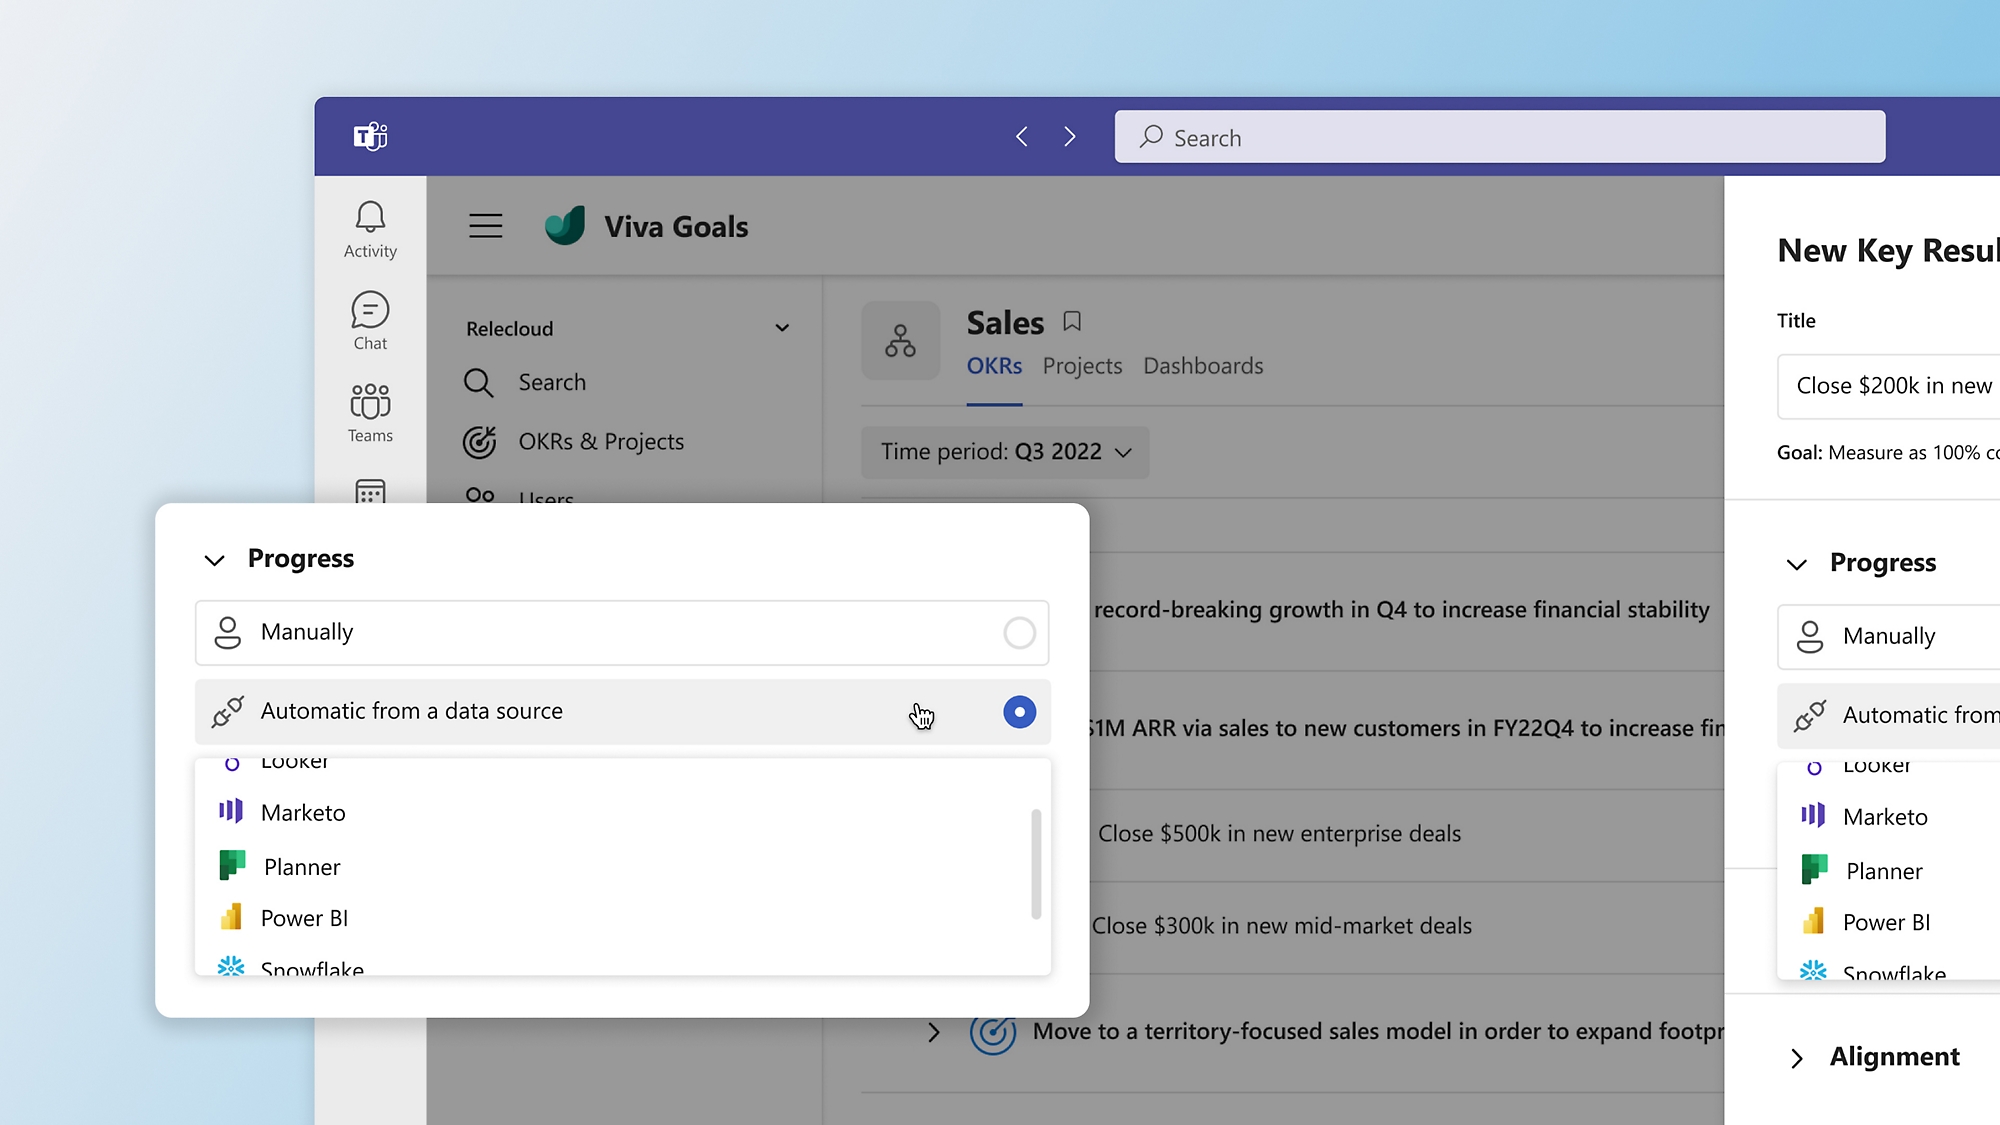
See how your team’s daily work impacts your organization’s key priorities and connect OKRs to the work systems your team is already using.
-
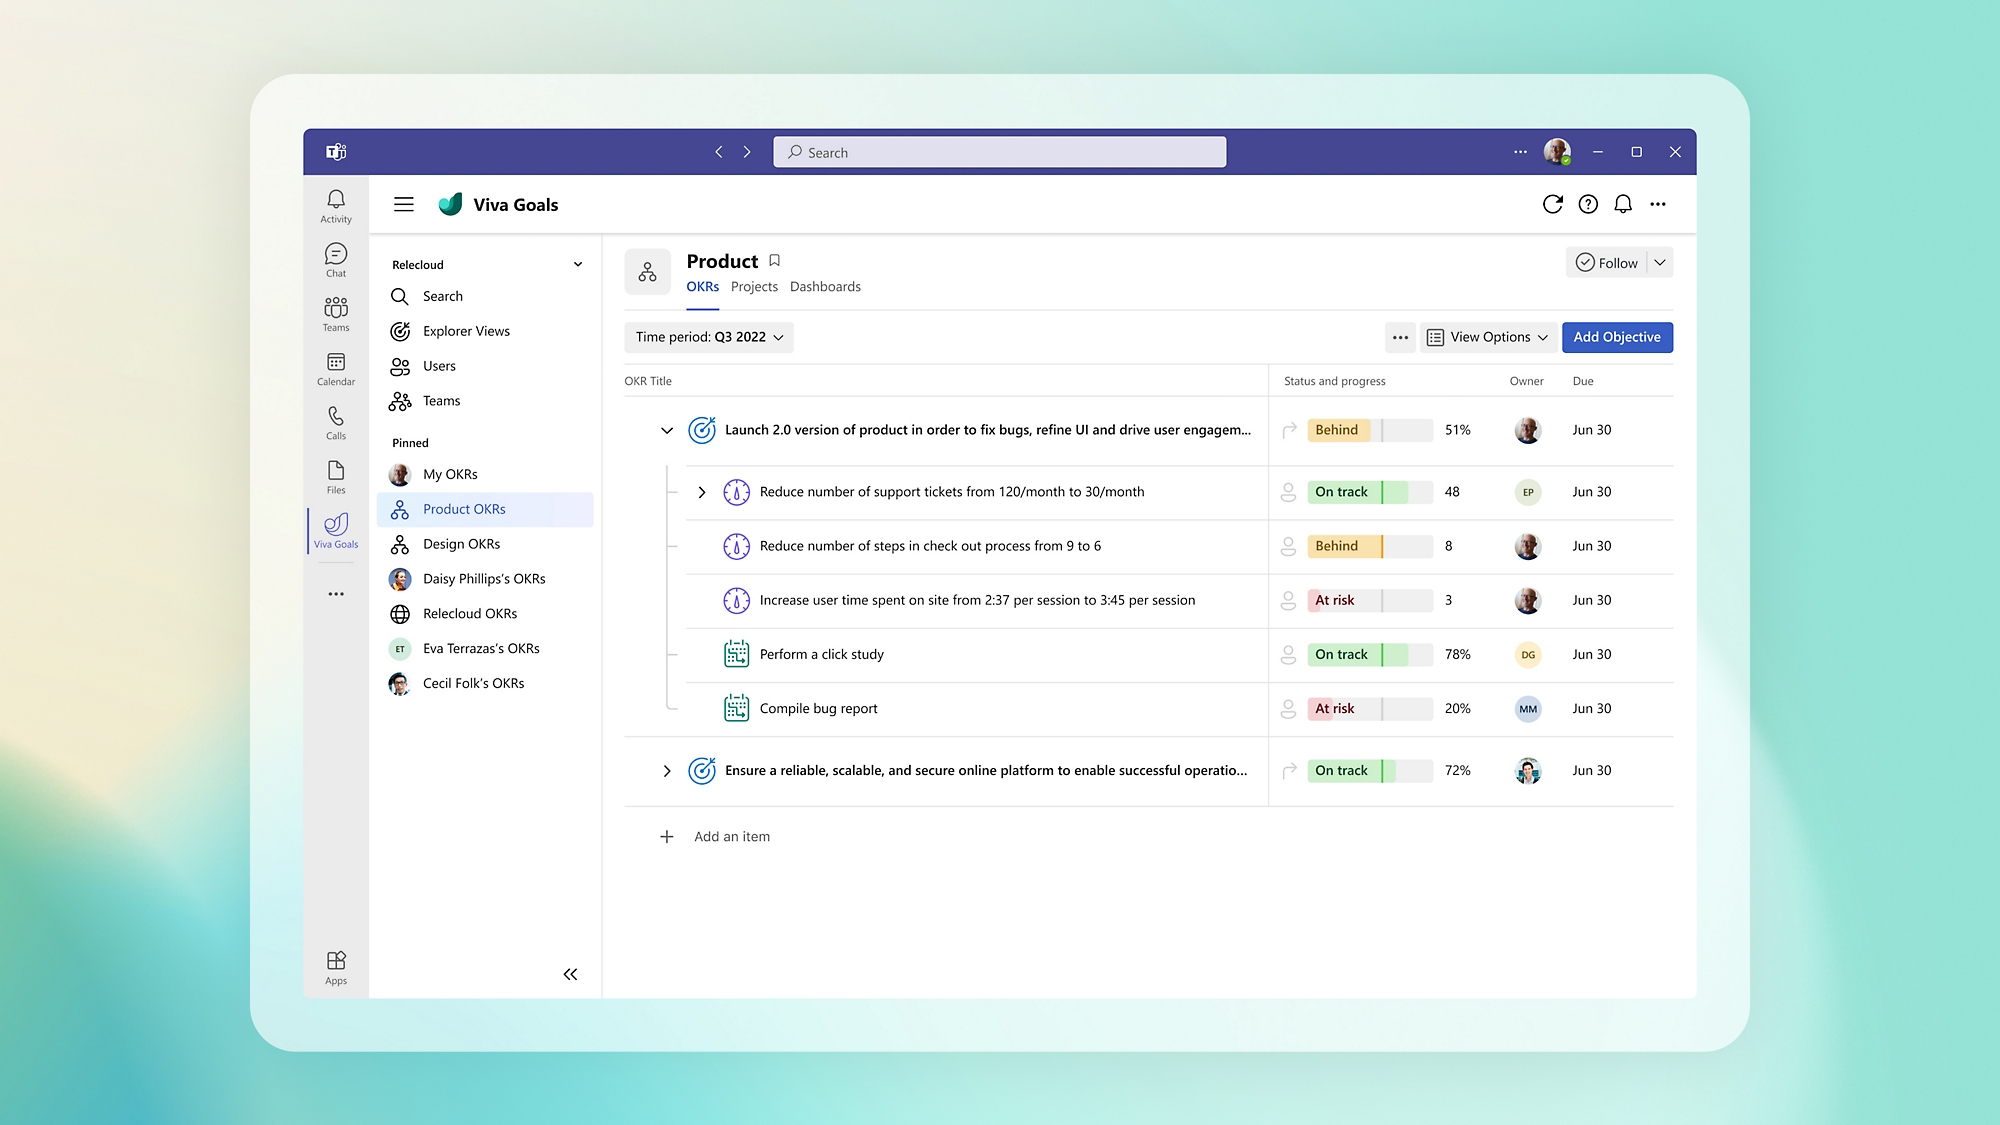
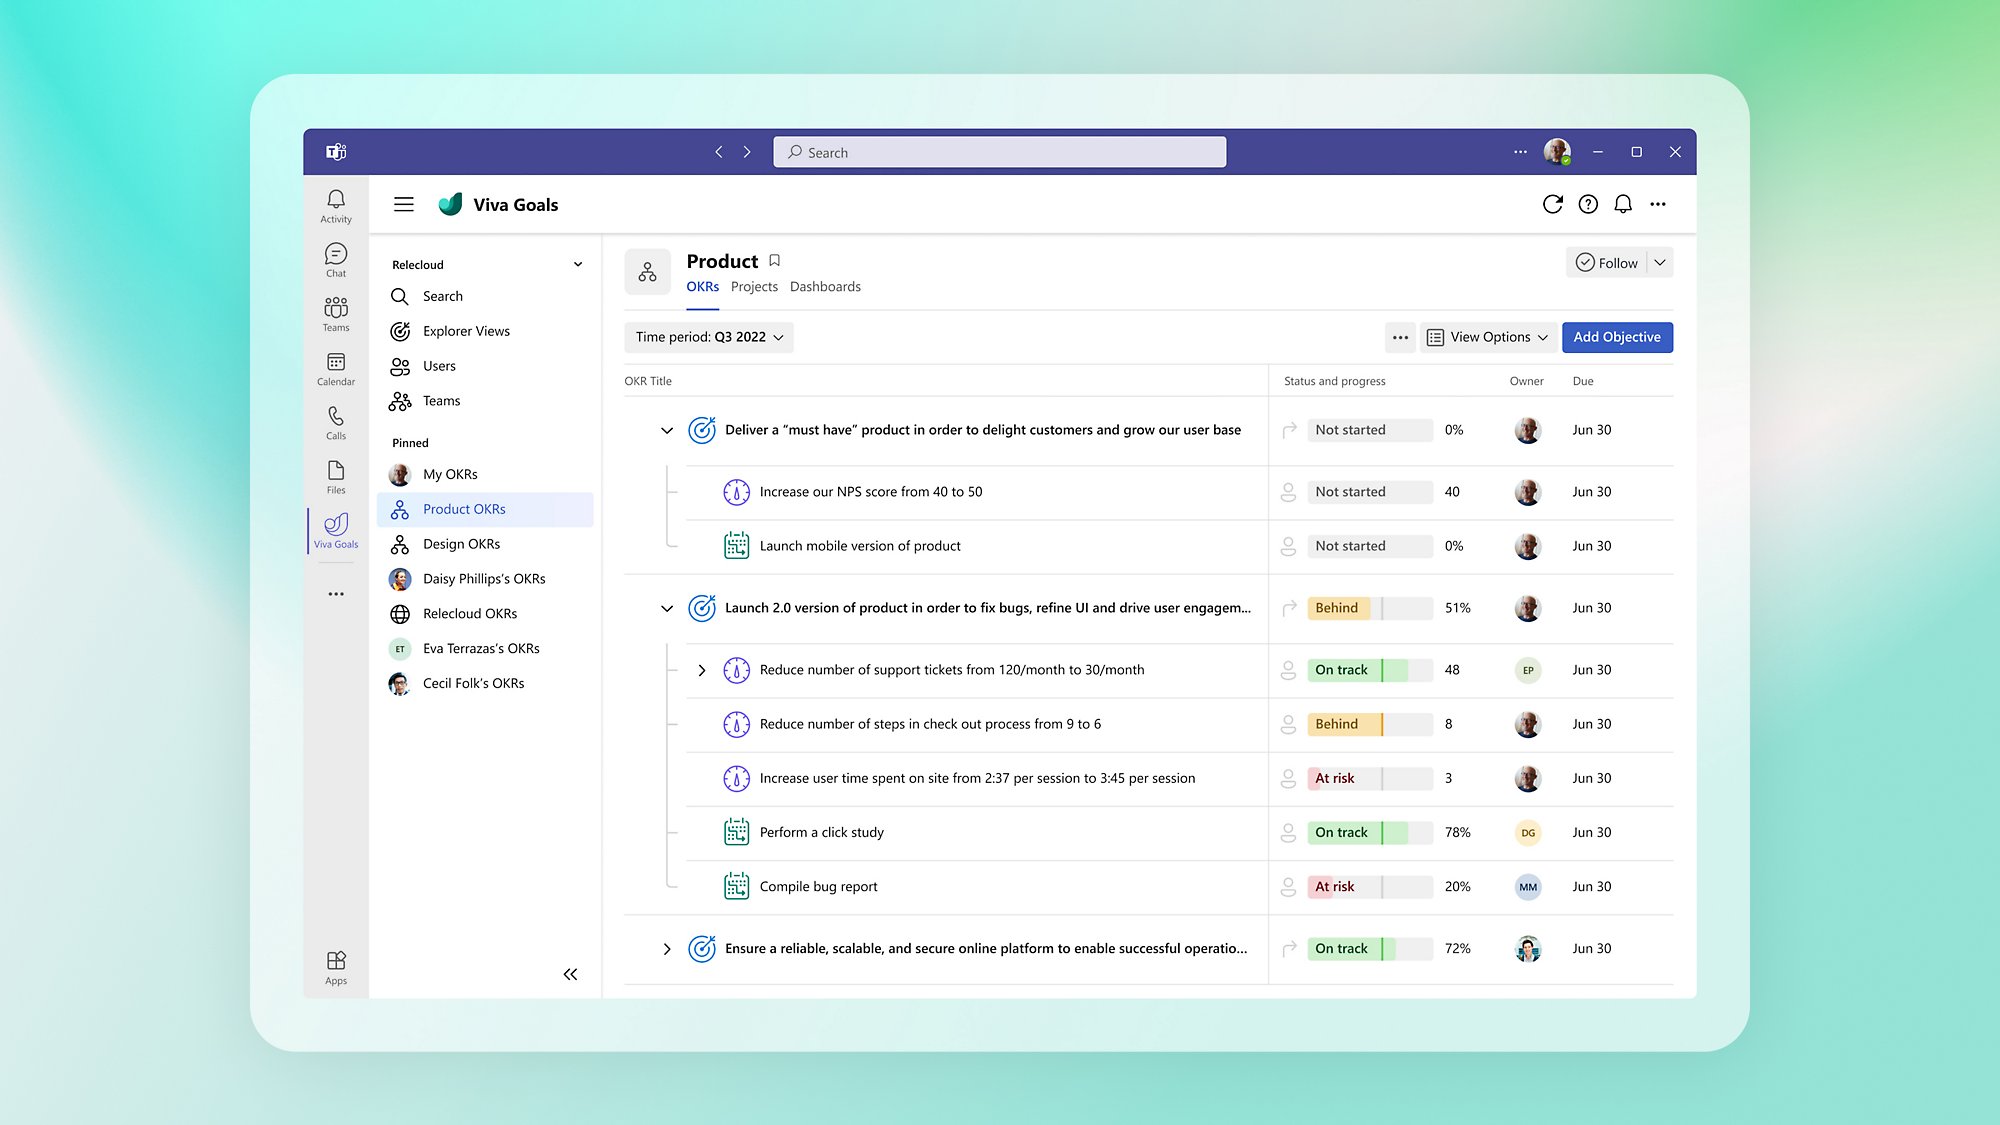
Focus teams on impact, not output
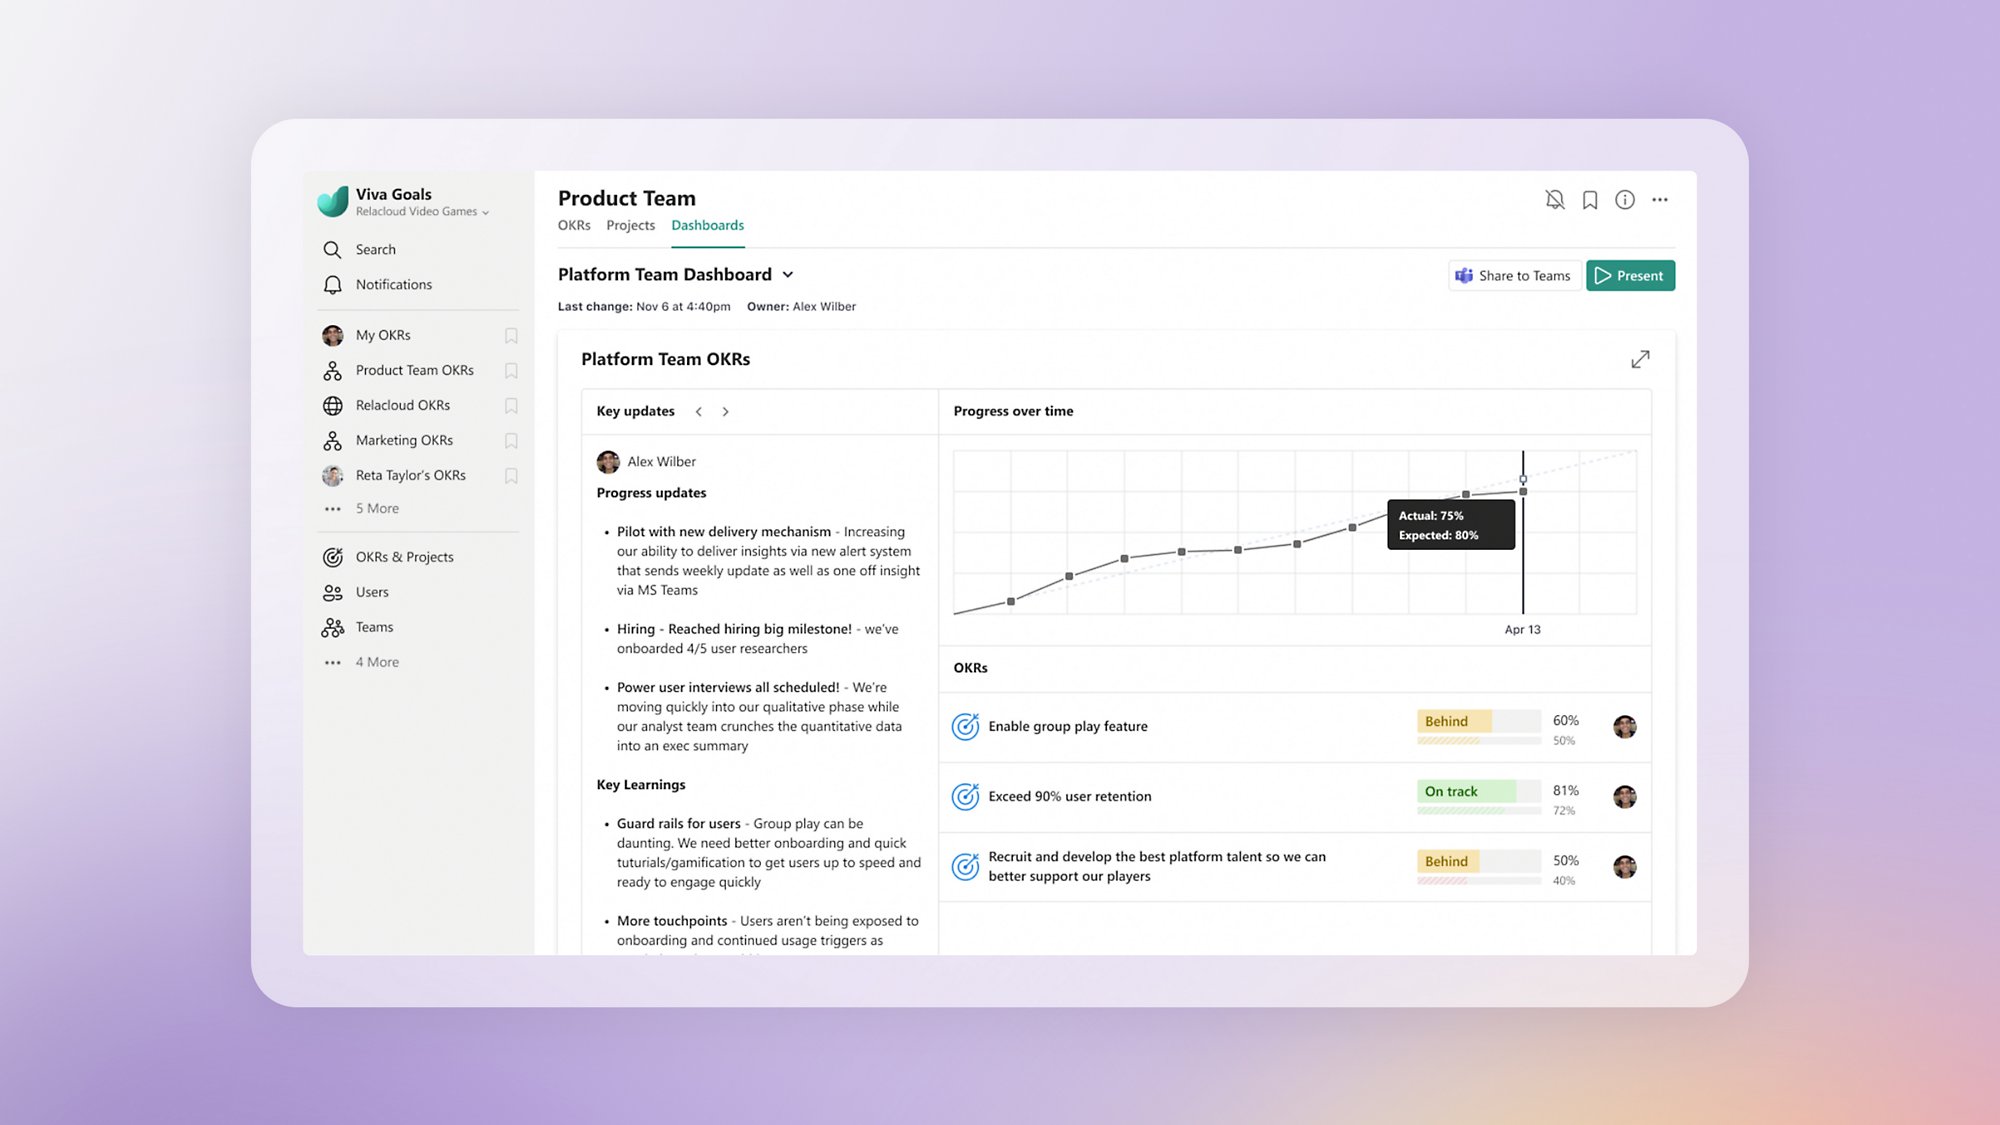
Focus discussions, provide context, and simplify reporting on progress with custom dashboards and dynamically updated OKRs.
Keep everyone focused on high-impact work
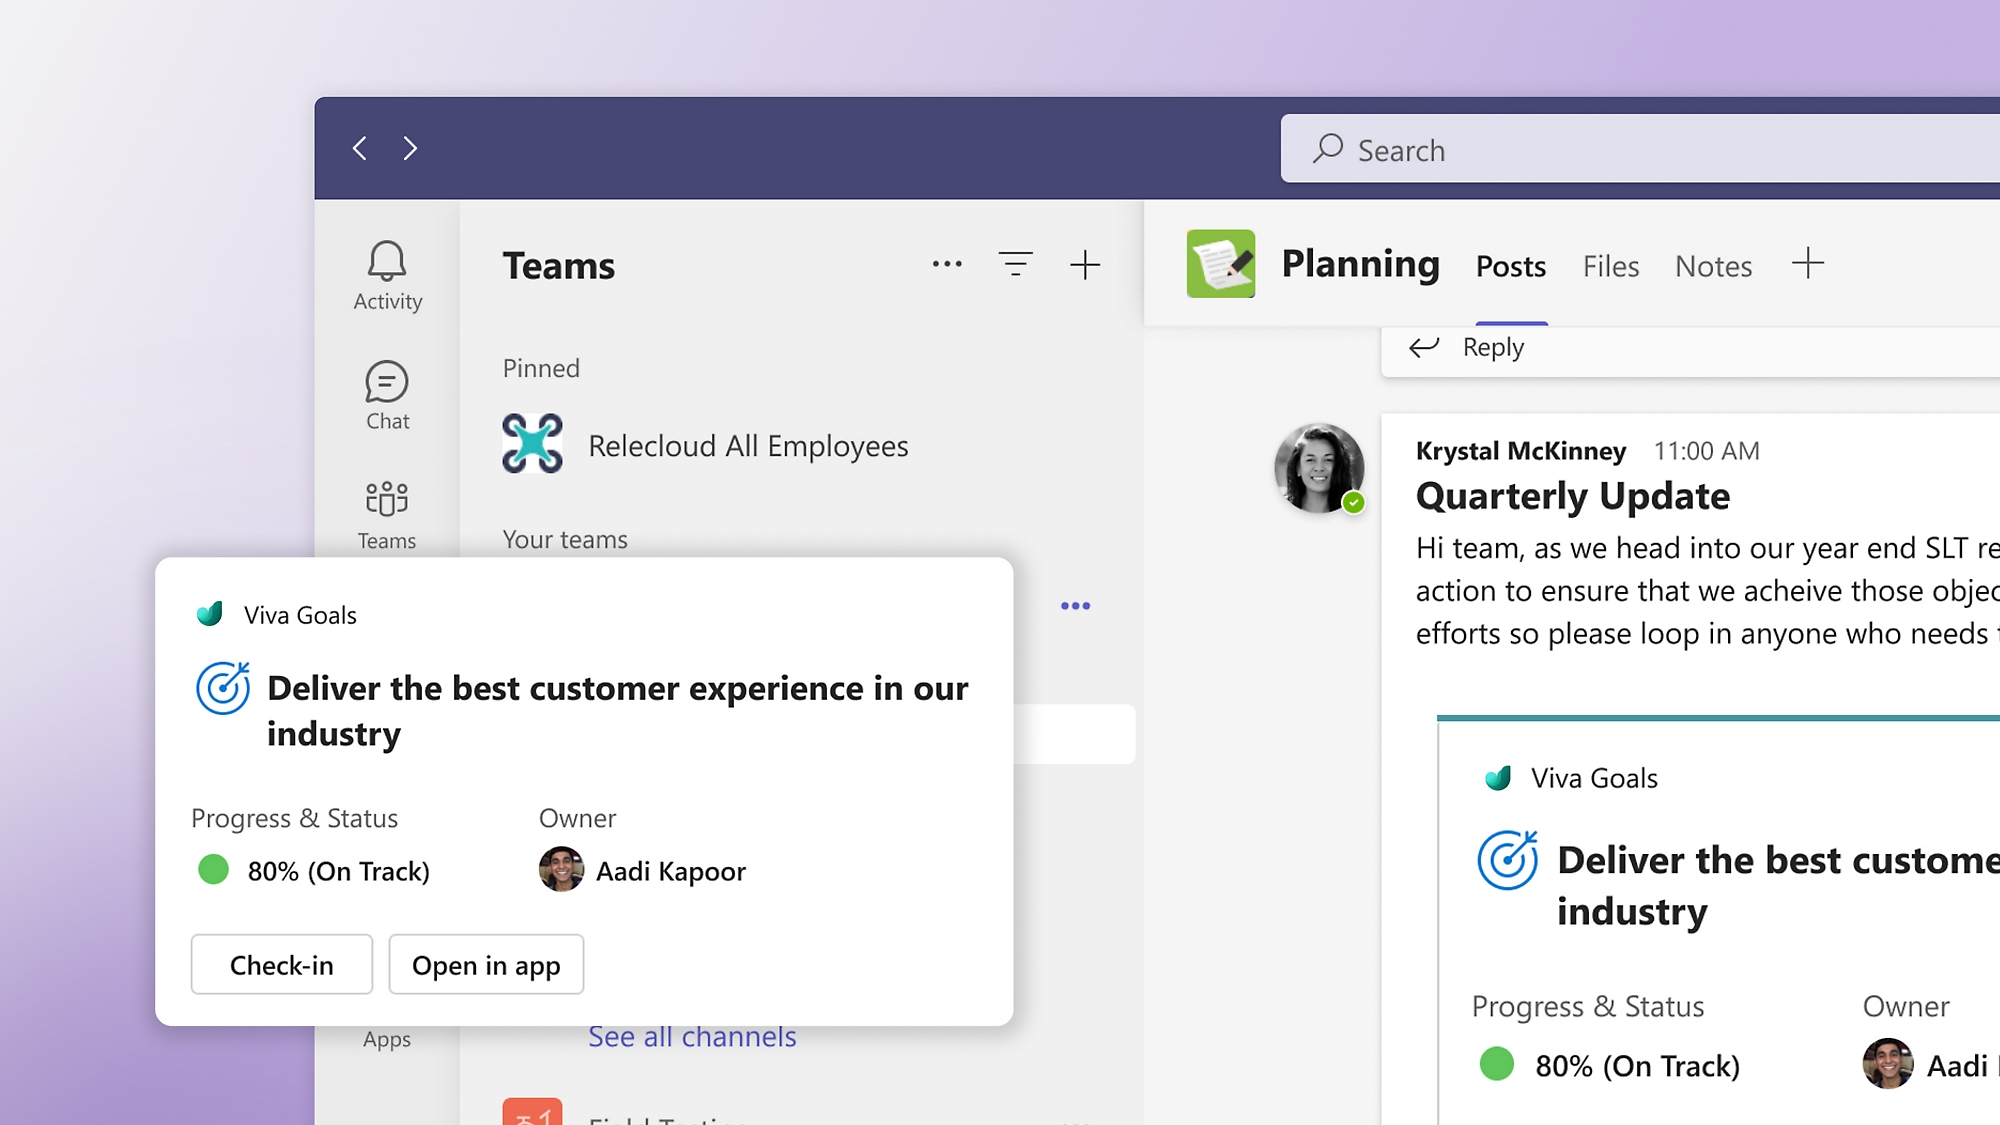
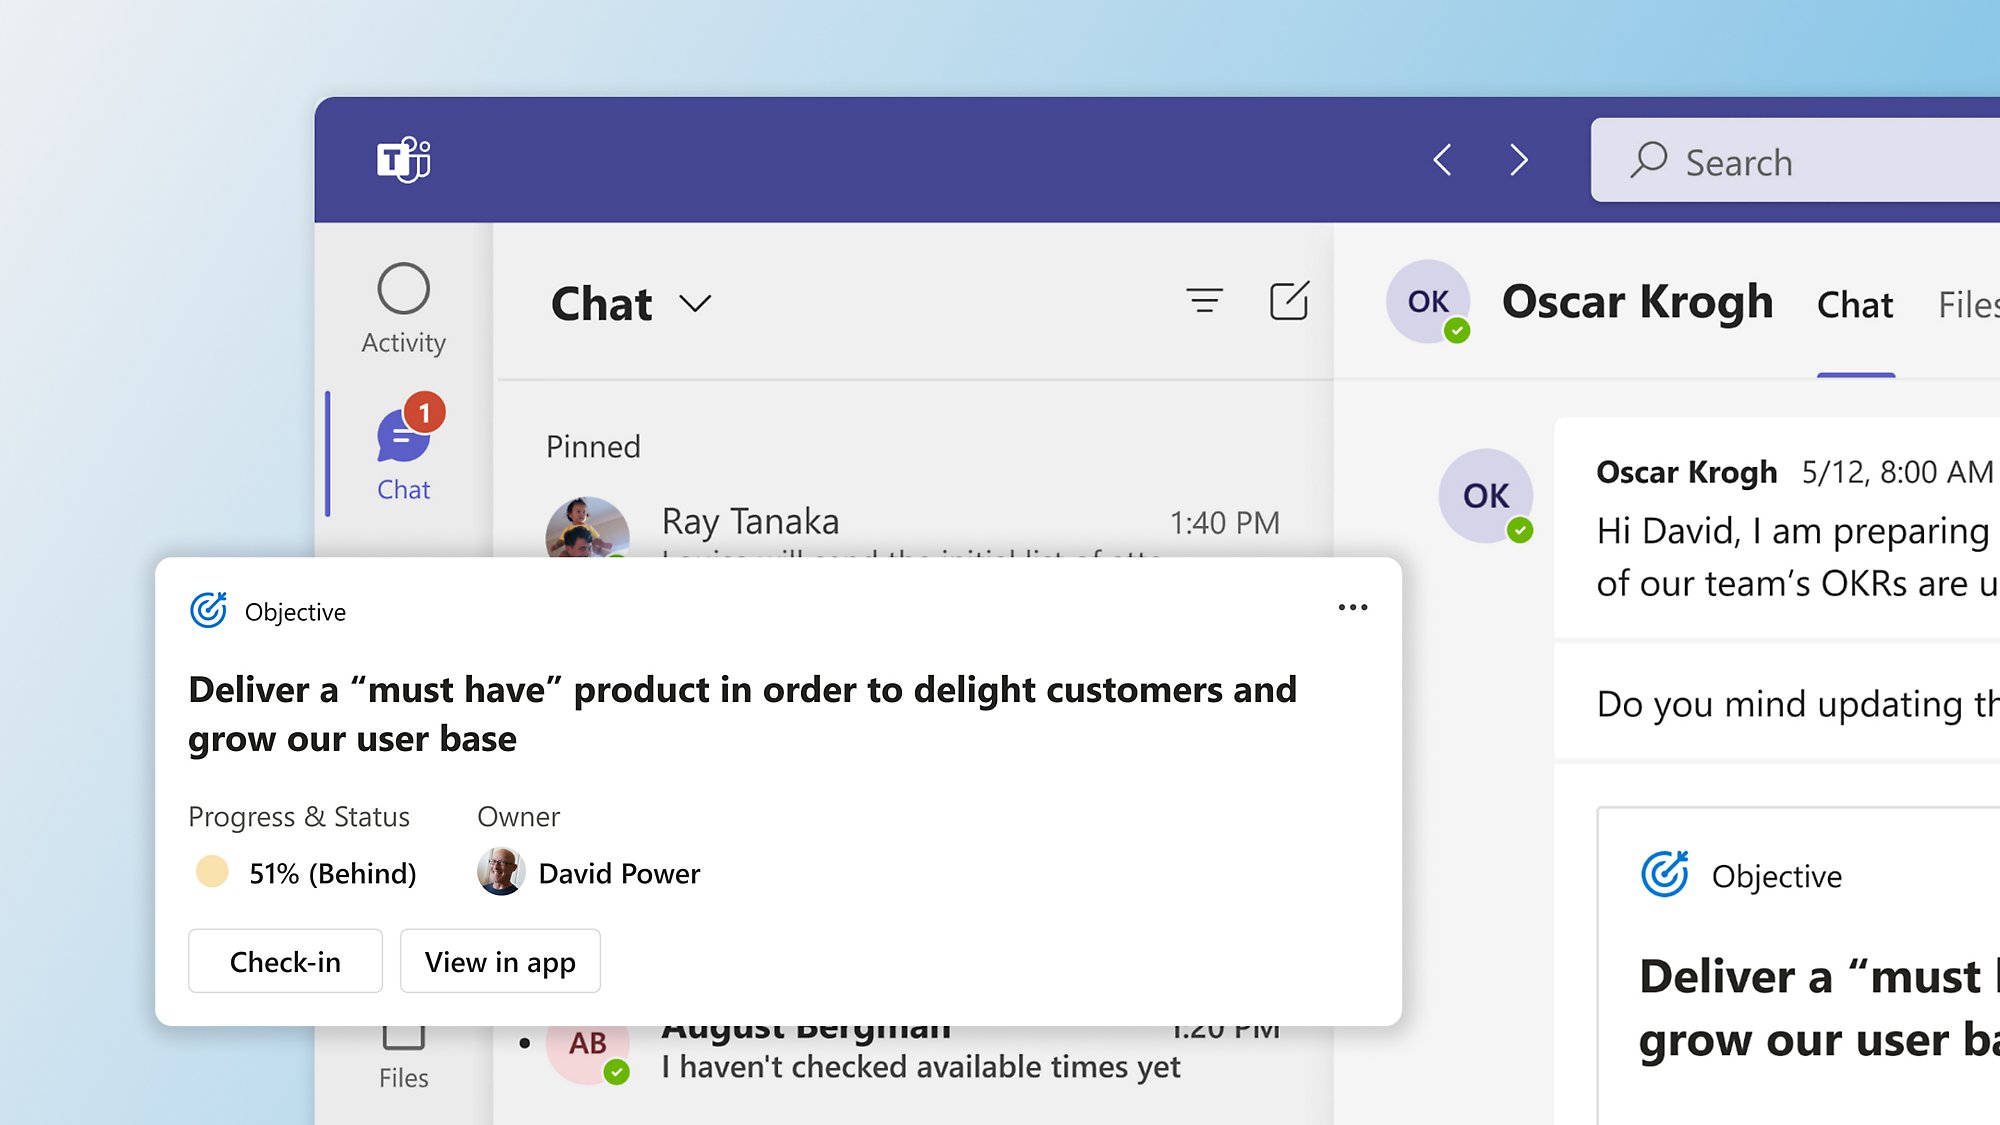
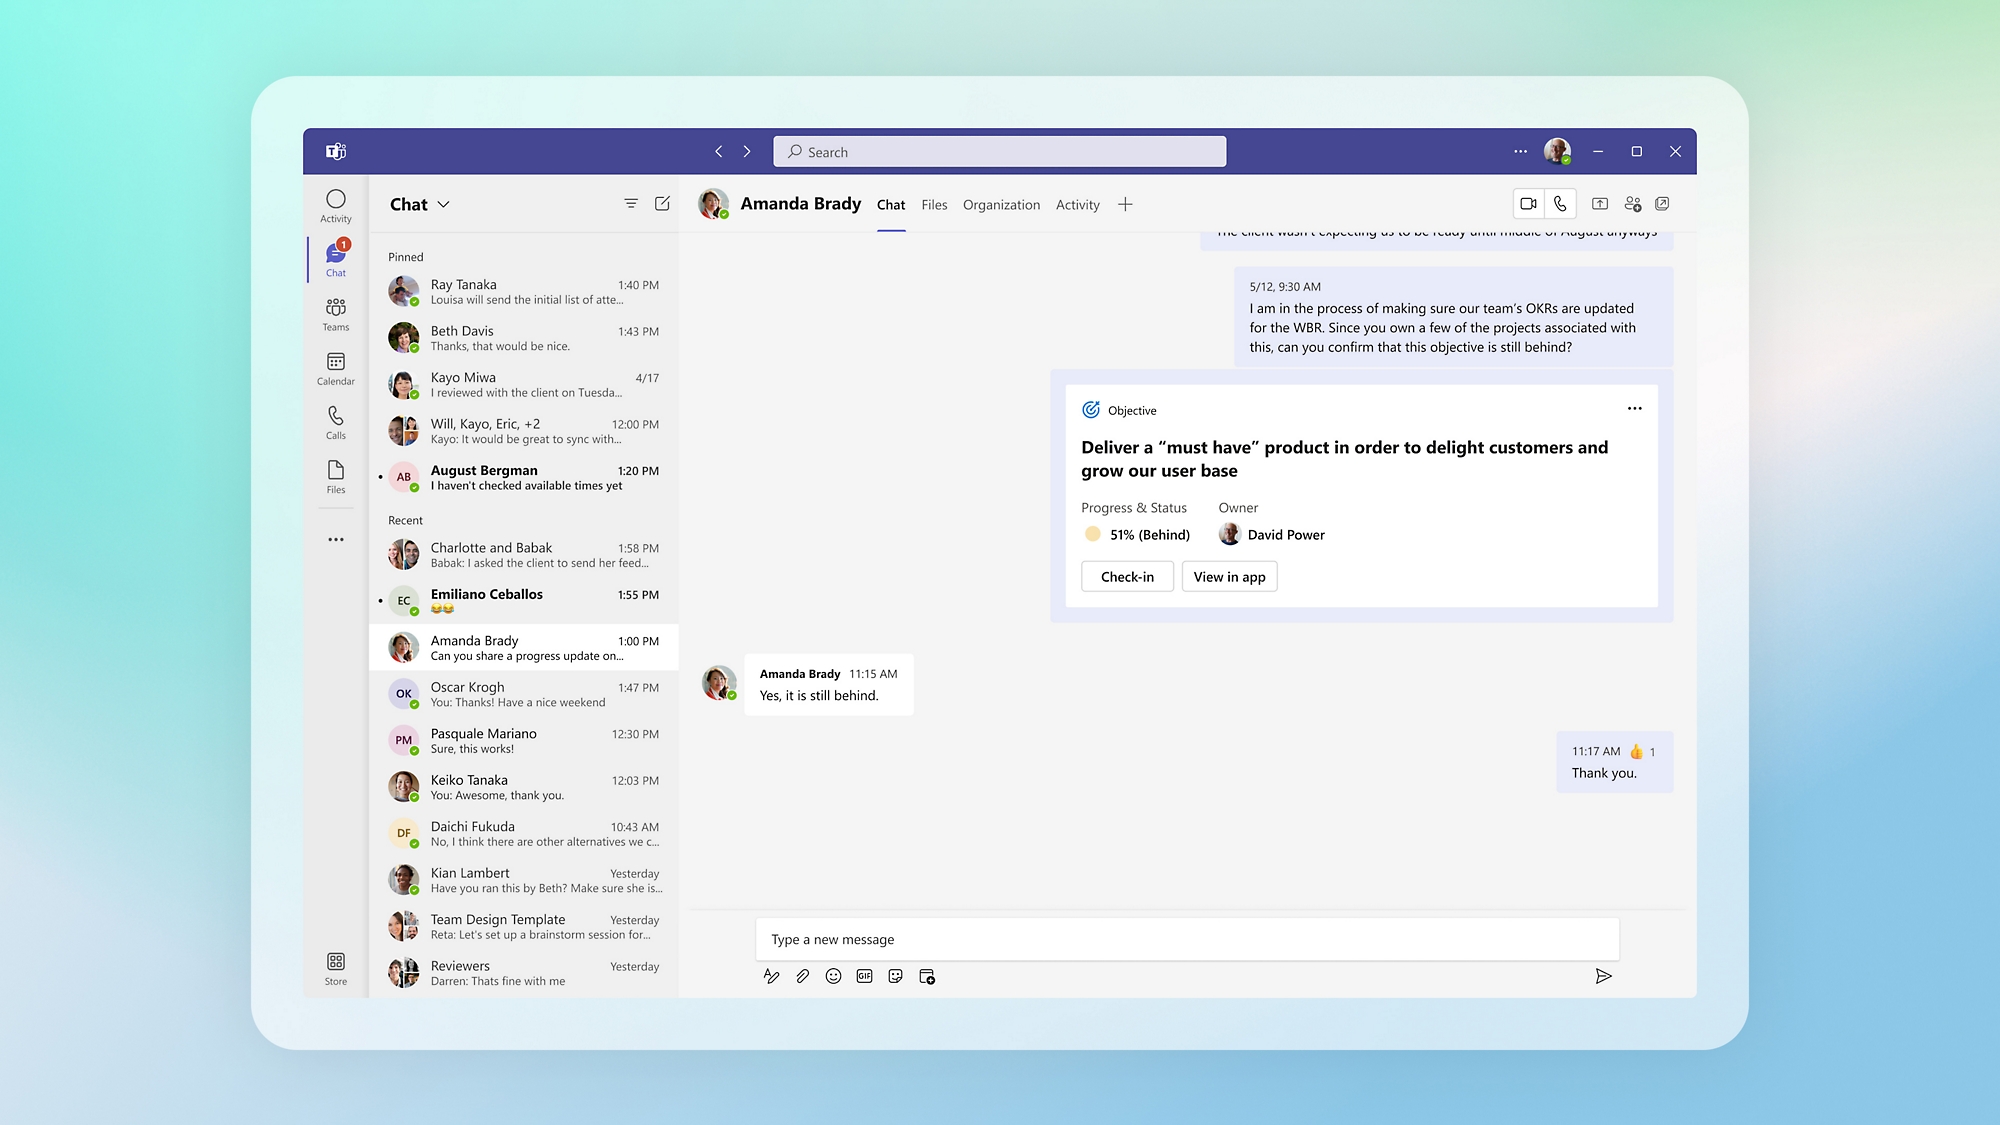
Make it easy to view and share progress, and enable check-ins and nudges in Microsoft Teams.
Present on progress at meetings
Share progress, context, lessons, and next steps with employees using customizable presentation templates.
Back to tabsHelp employees stay focused
Connect daily work to organization and team goals using interoperations with Teams, Azure DevOps, Jira, Asana, Tableau, and other apps.
-
Keep goals front and center
Encourage conversation and collaboration around goals and help everyone thrive in the hybrid workplace.
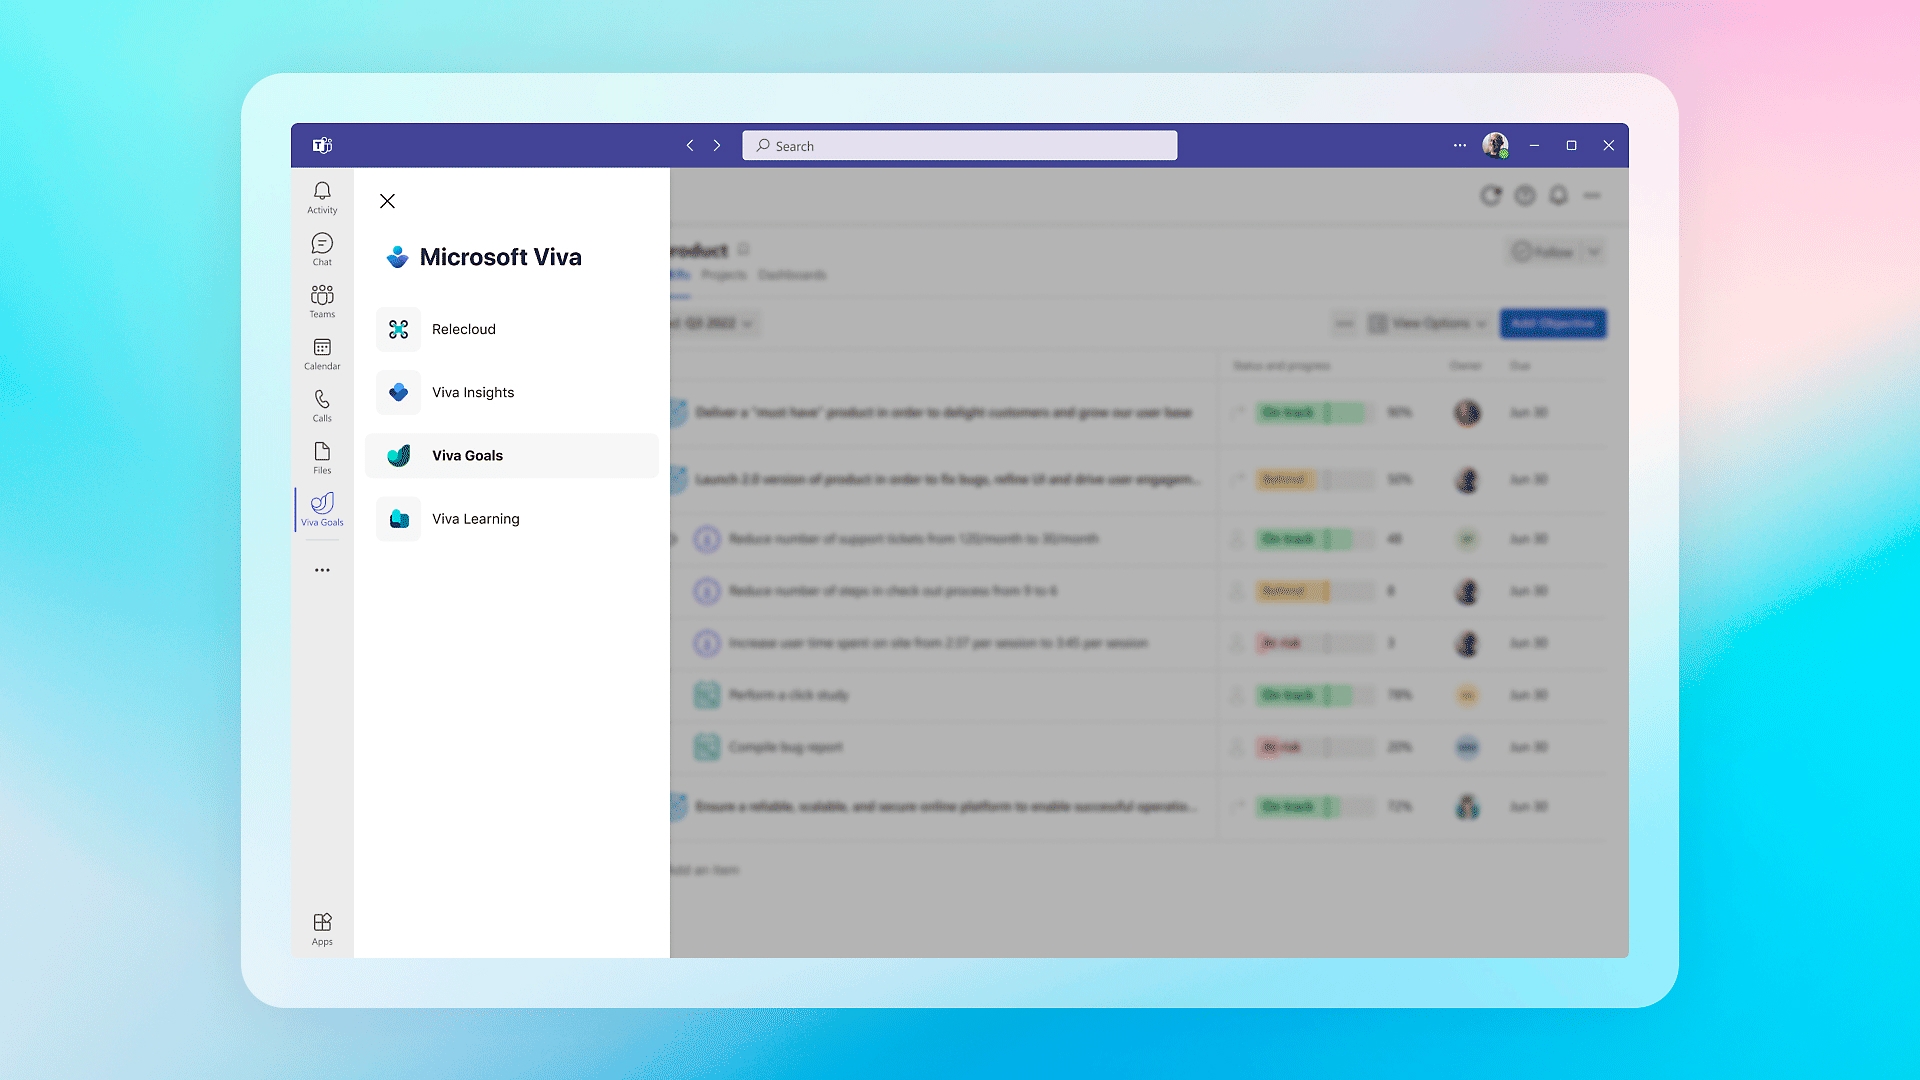
Stay in the flow of work
Promote a purpose-driven culture with the Viva Goals app in Teams and Azure Dev Ops.
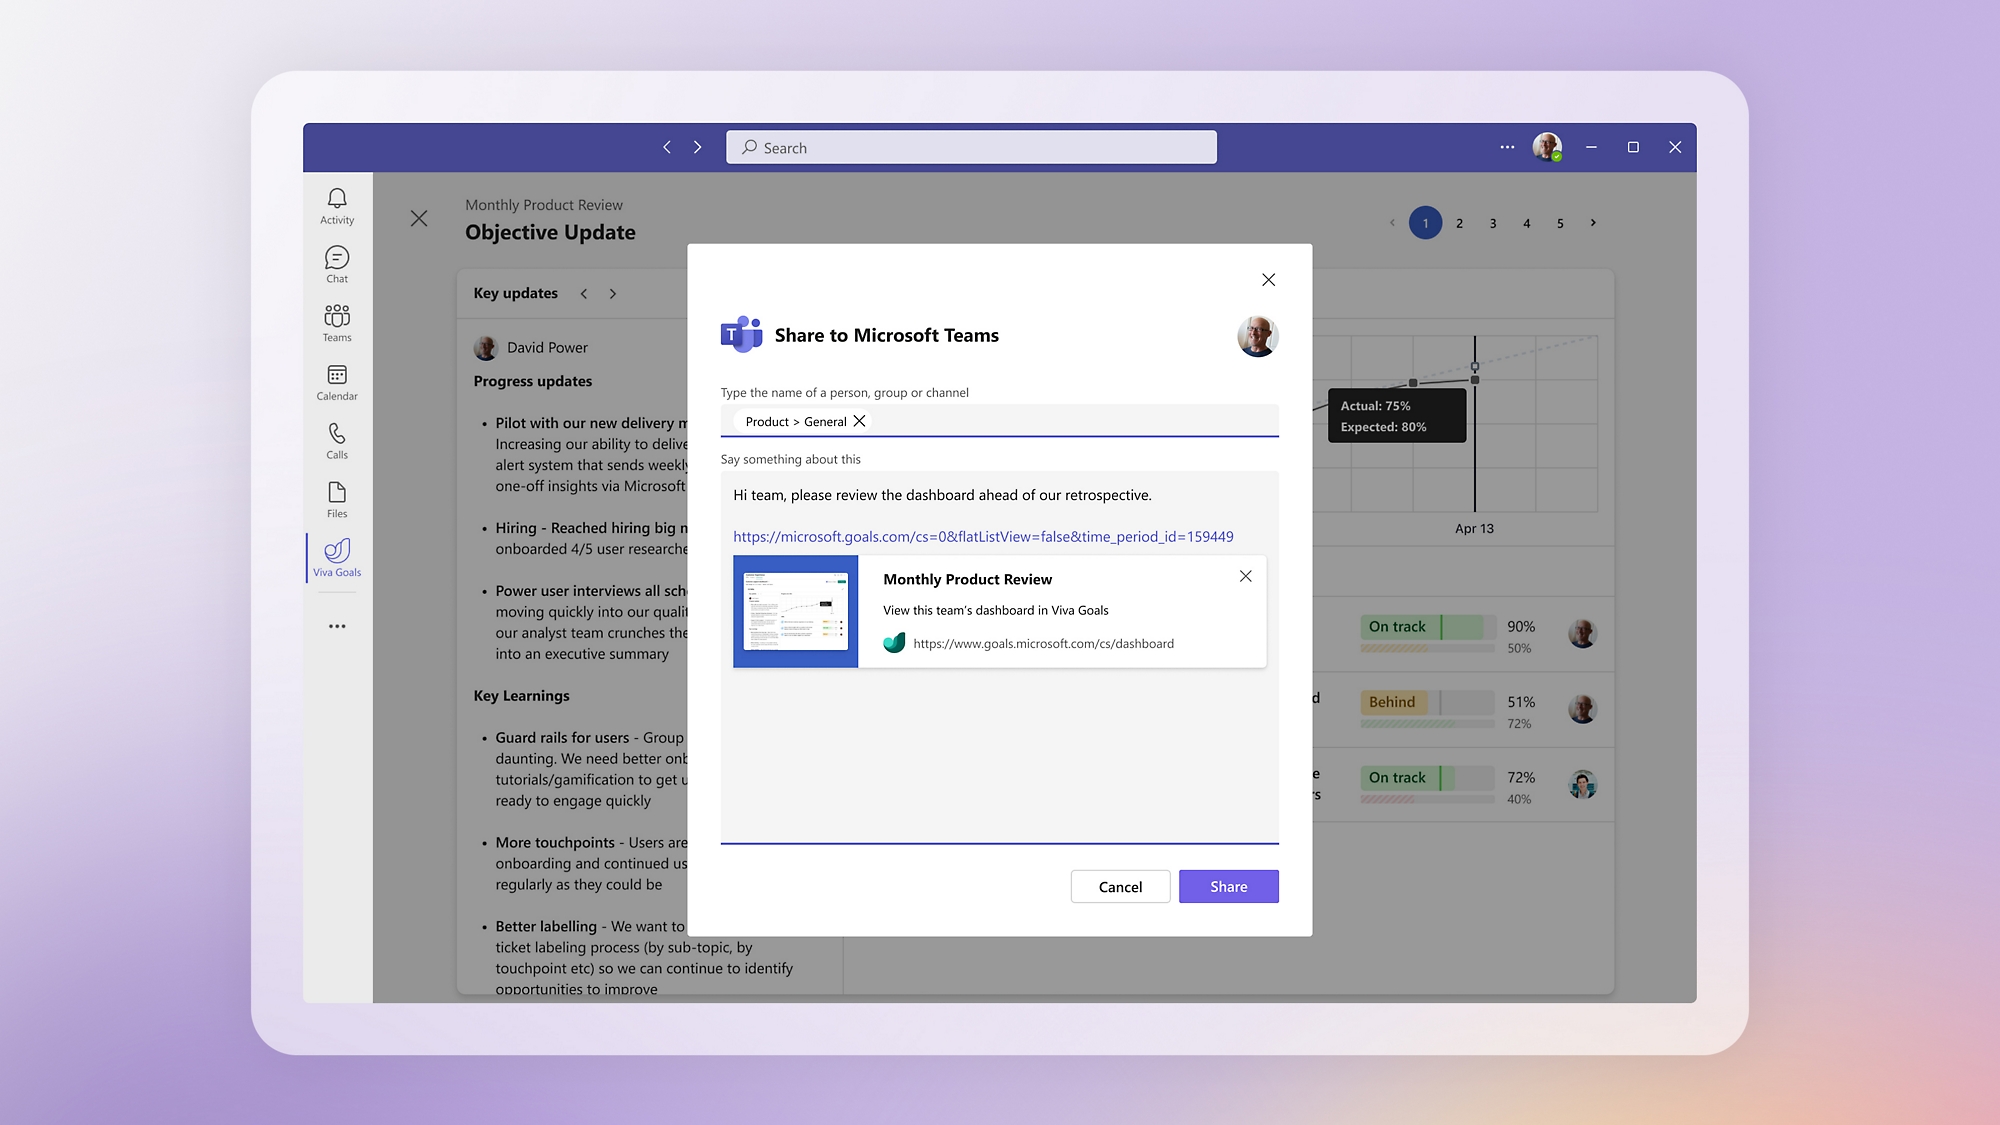
Rally conversation around goals
Communicate, collaborate, and check in on employee and business goals with the message extension in Teams chat.
Back to tabsKeep track of progress at all times
Increase visibility into goals and progress with integrations into critical work systems like Teams, Azure DevOps, Jira, Tableau, and ZenDesk.
See Viva Goals in action
Learn more about experiences that help teams come together to achieve results.
See how thousands of Microsoft employees are using Viva Goals


How the OKR methodology took root at Microsoft, team by team
Learn how teams throughout Microsoft use OKRs to drive company objectives like growth, diversity, and employee wellbeing.

How Microsoft is driving alignment with organization-wide adoption of Viva Goals
Learn how Microsoft is programmatically deploying Viva Goals across the entire organization and seeing massive impact.


Implementing OKRs with Viva Goals and engaging employees
Learn tactical tips for removing roadblocks and creating an engaged, productive workforce from the OKR Enterprise Accelerator Team at Microsoft.
See how customers are using Viva Goals

“Introducing Viva Goals and objectives and key results (OKRs) has been a huge step forward in both the digital and cultural transformation of our business.”Chris Hoard, Partner Edu Lead, Vuzion

“Viva Goals has helped us operationalize more effective goal planning and management so we can drive maximum impact at every level, from leadership to managers to individual contributors.”
Justin McPhee, CSO, Engage Squared
Features and pricing
Microsoft Viva in Microsoft 365
-
Some employee experience features are included in Microsoft 365 plans for enterprise.
Microsoft Viva Goals
Originally starting from $6.00 now starting from $6.00
$6.00 $6.00
user/month
(Annual subscription–auto renews)1
-
All the employee experience features included in Microsoft 365, plus:
-
OKR workflows and templates
-
Shared OKR dashboards
-
Integrations with critical tools and data sources
-
SSO capabilities, data encryption, enterprise-grade privacy, and advanced permissions
-
Advanced OKR configurations with customizable weights and scoring guidance
Microsoft Viva Suite
Originally starting from $12.00 now starting from $12.00
$12.00 $12.00
user/month
(Annual subscription–auto renews)1
-
Everything in Viva Goals, plus:
-
Support for multiple company-branded employee destinations for news and announcements in Viva Connections2
-
Viva Engage leadership and knowledge experiences to help connect everyone across your organization
-
Centralized campaign management for multichannel publishing with Viva Amplify3
-
Viva Insights to improve productivity and wellbeing with data-driven, privacy-protected insights
-
Organization-wide “voice of the employee” surveys in Viva Glint
-
Quick surveys to help managers seek and act on feedback with Viva Pulse3
-
Viva Learning to seamlessly integrate access to learning content into the places employees already spend their time3
Frequently asked questions
-
The Viva Goals license includes access to the Viva Goals app in Teams2 and the Viva Goals web app. Use these apps to:
- Create, manage, align, and customize OKR workflows with OKR templates, automated check-ins, and advanced insights.
- Boost business rhythms with OKRs using shared dashboards and advanced insights.
- Connect work to outcomes with deep integrations to tasks, projects, and embedded OKR views.
- Integrate into critical tools, such as Teams, Slack, and Glip, to enable automated OKR check-ins.
- Get enterprise scale and security with single sign-on (SSO) capabilities, data encryption, enterprise-grade privacy, and advanced permissions.
- Use advanced OKR configurations with customizable weights and scoring guidance.
-
Viva Goals is available as an app in Microsoft Teams and as a web app. The Viva Goals web app has no prerequisites—customers can purchase and use Viva Goals with the web app without any other Microsoft product or subscription.
A Microsoft Teams product license is a prerequisite to use the Viva Goals app in Teams. Teams can be licensed with:
- Microsoft 365 F1, F3, E3, A3, E5, A5.
- Office 365 F3, E1, A1, E3, A3, E5, A5.
- Microsoft 365 Business Basic, Business Standard, Business Premium.
- Microsoft SharePoint K, Plan 1, or Plan 2 license.
-
In October 2021, Microsoft acquired Ally.io, a leading OKR company. With Viva Goals, Microsoft invested further into Ally.io capabilities to improve integrations with Microsoft Teams3 and weave Ally.io into Viva, Azure DevOps, Power BI, Microsoft Planner and Project. There will be more integrations with a broader set of Microsoft 365 applications and services over time in addition to partner integrations. See the full list of data integrations in Viva Goals documentation.
Microsoft has also invested in Viva Goals to ensure it delivers on enterprise scale and security requirements with features including single sign-on (SSO) capabilities, data encryption, enterprise-grade privacy, and advanced permissions.
-
Yes, Viva Goals is now available in all Microsoft global markets.
-
Viva Goals currently supports 11 languages: English (US), French (France), Portuguese (Brazil), Spanish (Spain), Chinese (Simplified), Chinese (Traditional), Estonian, German, Italian, Japanese, and Korean. By the end of March 2023, we will support 27 Microsoft 365 languages that are written left to right.
Implementation and support
FastTrack
Get help enabling Microsoft Viva and the foundational capabilities in Microsoft 365 that support employee experience.
Additional resources

Forrester 2023 State of Goal-Setting Report
Learn the latest trends in goal setting and management from enterprise organizations across the globe.

Help employees see their impact
Vetri Vellore, Corporate Vice President of Microsoft Viva Goals, shares how OKRs can help everyone understand why their contributions matter.

Enhance performance and productivity
Explore how to drive better business outcomes and engage your workforce with Viva.

Microsoft Viva for Microsoft Partners
Explore tailored resources to learn more about the Employee Experience opportunity.

Motivation Matters
Learn how to gain a competitive edge by building a company culture that fosters a sense of belonging, ownership, and inspiration.

Engage Your Employees
Learn how OKRs can help increase employee engagement, focus, and productivity while driving business goals.
Get started with Viva Goals

Empower people and teams to be their best
Viva Goals is part of Microsoft Viva, the employee experience platform designed to help people connect, focus, learn, and thrive at work.
- [1] Cancellation policies for paid subscriptions may vary based on factors such as your customer status, your product, and your domain selections on Microsoft. You may cancel your subscription at any time in the Microsoft 365 admin center. Certain subscriptions may incur a cancellation fee. Learn how to cancel your Microsoft 365 subscription. When a subscription is canceled, all associated data will be deleted. Learn more about data retention, deletion, and destruction in Microsoft 365.
- [2] Microsoft Teams license required.
- [3] Microsoft Teams-integrated features require a Teams license to enable but can be used without Teams via web or other in-app experiences.
Follow Microsoft 365